How to Migrate from Magento to Another eCommerce Platform
Magento remains one of the most popular eCommerce platforms available. After the release of Magento 2, Adobe has ended all support for Magento 1 effective on July 30th, 2020.
This leaves millions of Magento users in a tight spot, forced to migrate to Magento 2 or another eCommerce platform.
In either case, it can take several weeks and a substantial amount of money to conduct a full shop migration project.
The caveat here is that by taking a methodical approach, you can transition smoothly from Magento to another ecommerce solution without having to cease online business operations.
This guide will serve as a tutorial in switching from Magento to Shopify app store, BigCommerce, and WordPress.
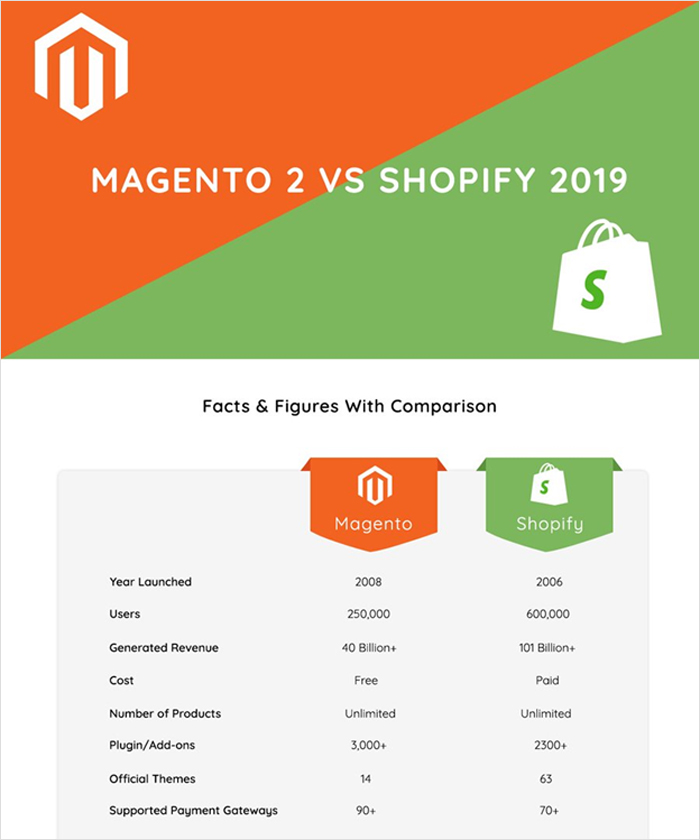
Magento to Shopify
There may be a wide variety of different reasons why you may consider a switch to Shopify api from Magento. One key reason is Shopify is hosted for you, which means that you don’t have to worry about traffic fluctuations on important shopping days like Cyber Monday and Black Friday.
You can also remain sure that your website is secure and update your inventory and store, while benefiting from exceptional customer support. Fortunately, migrating to Shopify platform is a relatively straightforward process.
Here are all of the steps for making the switch to Shopify data migration.
Step #1: Keep Your Business Running
A website migration takes a lot of time. Until your new store has been set up and optimized, it’s essential to keep your Magento store running in the meantime. You can inform your existing customers and email subscribers through email that your online stores will be moving soon.
Step #2: Determine What You Want to Migrate
Migrating your customer information and products to your new Shopify store is key here, and you may also want to consider migrating your status data and order history. However, if you’ve been using Magento for quite a while, there may be information you want to leave behind.
It’s highly recommended to take with you as much import data as possible, but if you’re constantly weeding through tons of obsolete data, you should truncate your data migration files.
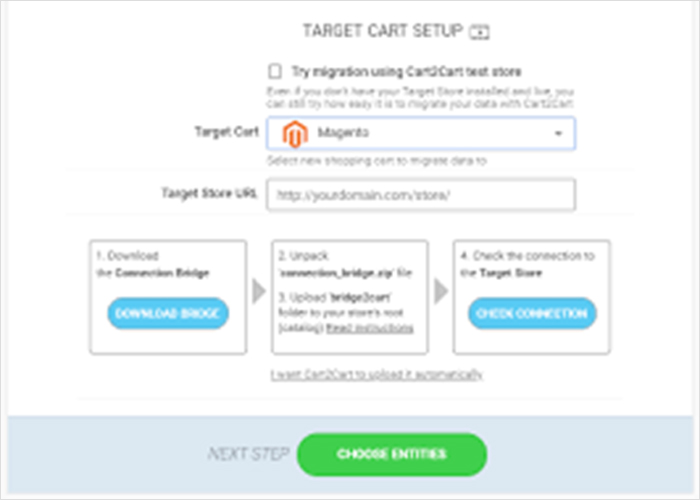
Cart2Cart is a popular app that allows users to checklist specific data they’d like to migrate or delete.
Similarly, you may want to migrate marketing content, blog posts, and static pages to your new store and leave others behind. Whatever you decide to bring over to your new store, it will need to be reconfigured to fit the new design.
For this reason, it’s recommended to work with a web development agency to ensure that your transition to another eCommerce platform is a smooth one.
Step #3: Start a Shopify Account
Shopify offers new users a free trial. This gives you the opportunity to try out the platform for yourself and get your feet wet. Before you commit to Shopify, you should try out its features and familiarize yourself with its collections, page layouts, menus, and features.
Whatever you don’t understand, you can speak to the customer support team to gain broader insight for their platform.
Step #4: Back Up Your Magento Store
This step is very important. Sometimes, online store migrations don’t go as planned. It can be an absolute disaster for this to happen and all of your store data is deleted. Therefore, keep a full backup of your Magento store just in case your migration falls through.
Make sure that all custom and standard data from your website is stored properly in a location you can easily access. Performing a backup is simple on Magento website if you follow these steps:
- Navigate to the admin sidebar and click System > Tools > Backups.
- In the upper-right corner, you’ll see options for the type of backup you want: system backup, database & media backup, and database backup. The system backup will create an external copy of all of your store’s data. A database & media backup will create a copy of your database and media files. A database backup will only create a copy of your database.
- Select whether you want to place your store in maintenance mode or not.
- If you select a system backup, you can select the checkbox to include your media folder.
- Confirm the backup and wait for its completion.
Step #5: Migrate Your Data
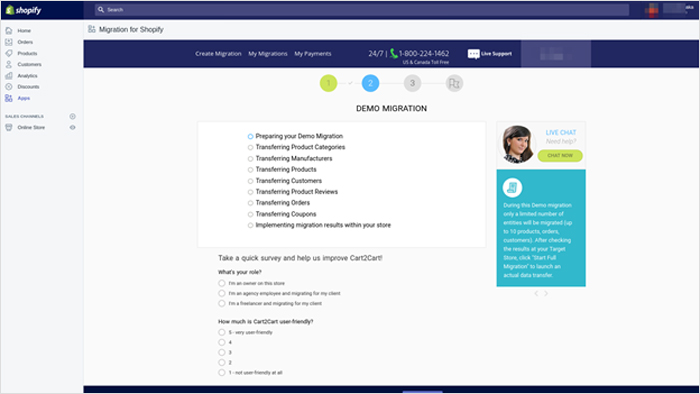
For the main successful migration process, you can rely on apps like Cart2Cart and Shopify’s Magento Importer to get most of the work done. Alternatively, you can import all of your data files manually.
If you choose the latter option, you’ll ultimately upload your data as a CSV file. Truthfully, this is a very complicated process. It’s best to hire a developer to carry out a manually installation of your store data to new Shopify store.
Step #6: Perform Tests
Once your magento migration is complete, perform rigorous tests to make sure that all of your data transfer is visible. You can do this by running test orders through checkout. Check to see that your customer data is displaying properly, is perfectly organized, and that you’re able to manage each aspect of your store like before.
Step #7: Restyle Your New Store
Your new store will not look identical to your old one. Whether you’re designing something from scratch or using a premade theme, moving to a new platform means making both front-end and back-end adjustments that can change the look of your store.
One of the major benefits of Shopify is its abundance of different themes you can use for your new store. Once you choose a new theme, make sure that your content is a perfect fit. If not, then you should look for another theme or replace it for something else.
Overall, your new Shopify store will have a noticeable design difference from your last Magento store.
Magento to BigCommerce
Again, Magento may not be for everyone. Many store owners may be turned off by the idea of spending so much money on maintenance, licensing, and hosting fees just to keep their store running.
Fortunately, just like Shopify, migrating to a BigCommerce isn’t a tremendous job. In fact, it may be extremely beneficial to make the switch for these reasons:
- Unlimited Scalability – BigCommerce is a cloud-based platform, which means there are automatic store upgrades that don’t require you to buy more server capacity.
- Peak Simplicity – BigCommerce offers plug-in-play apps that integrate with minimal coding or only a few clicks.
- Easy Customization – If the native BigCommerce apps don’t fit your needs, the platform makes it easy for a developer to customize anything you need.
- Tight Security – BigCommerce utilizes automated PCI compliance, fraud protection tools, and an integrated DDOS (Distributed Denial of Service Attack) system to ensure maximum security for your store.
- Low Management Costs – With BigCommerce, store owners can lower equipment, hosting, server maintenance, repair, and software upgrade costs.
If all of these benefits sound lucrative to you, then follow these steps to migrate from Magento to BigCommerce.
Step #1: Pre-Migration Planning
Before you begin moving the store settings and product catalog, you should take deep inventory of what you plan to bring along and leave behind. Create a detailed list of all data, such as products, customers, and categories. This data will make the move to BigCommerce.
Now, data like legacy apps, store settings, outdated content, and bundled software will get left behind.
Step #2: Provide the Information and Source
Record your current Magento login information and store URL. For your website to launch correctly, keep the most linked to pages and URLs in their original structure and carry them over from Magento to BigCommerce.
You can use Cart2Cart to begin the process of migrating your data.
Step #3: Backup Your Data
You don’t want to lose out on your store data if your migration doesn’t go as planned. Perform an easy backup to safely store your data in another location. Here are the steps for getting the job done.
- Navigate to the admin sidebar and click System > Tools > Backups.
- In the upper-right corner, you’ll see options for the type of backup you want: system backup, database & media backup, and database backup. The system backup will create an external copy of all of your store’s data. A database & media backup will create a copy of your database and media files. A database backup will only create a copy of your database.
- Select whether you want to place your store in maintenance mode or not.
- If you select a system backup, you can select the checkbox to include your media files.
- Confirm the backup and wait for its completion.
Step #3: Choose the Data You Want to Migrate
Using Cart2Cart, choose all of the data you want to bring with you and omit the data you want to delete.
A migration is the perfect time for consolidating your store’s URL structure, removing outdated content, and streamlining your store’s navigation.
Step #4: Migrate & Test
Once you’ve made your selection of the data you want to take and delete, complete the migration and start performing tests. Verify that all of your descriptions, marketing content, images, and products work correctly before moving on.
Lastly, you should check that your third-party APIs are working effectively, along with these following features:
- Shipping, Payment Processing, and Checkout
- Third-Party Integrations (email marketing, shipping solutions, CMS, and other software)
- SSL Certificate
- Mismatches on Product Pages and Design Elements
- SEO (link directs, metadata, etc)
- Navigation Menus
- Responsive Testing
- Email Confirmations
- Loyalty Point Systems
Magento to WooCommerce
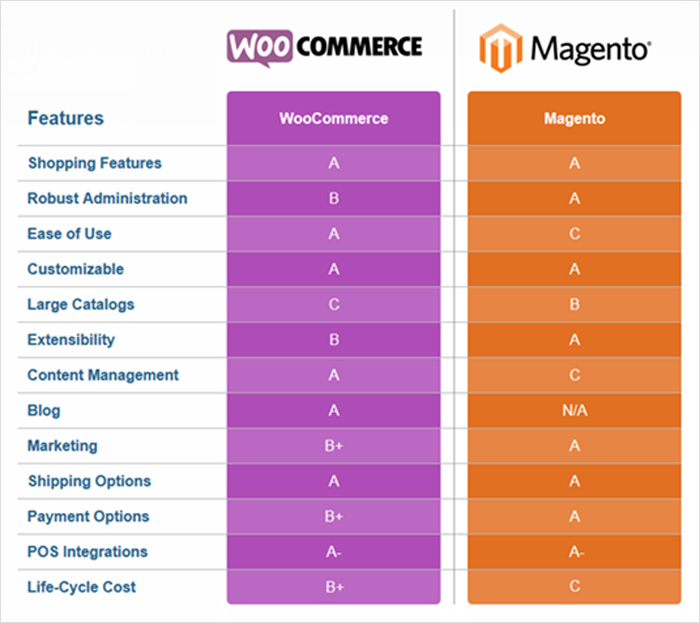
Have you decided to make the switch to WooCommerce? WooCommerce and Magento are definitely on par when it comes to several different features and offerings. Ultimately, it’s up to you to make the distinction.
Since WooCommerce is built from WordPress, migration won’t be too difficult. However, the process can be easily ruined if you don’t follow these steps.
Step #1: Make a Plan
Is there any data you want to specifically take to WooCommerce? Are you planning on leaving your outdated data behind? You’ll have to make these decisions before you move forward with migration.
Step #2: Sign Up for WordPress & Install WooCommerce
Unfortunately, WooCommerce cannot recreate a replica of your old site. However, the platform has several vibrant themes for you to choose from. You can choose from free and premium themes until you find what you’re looking for.
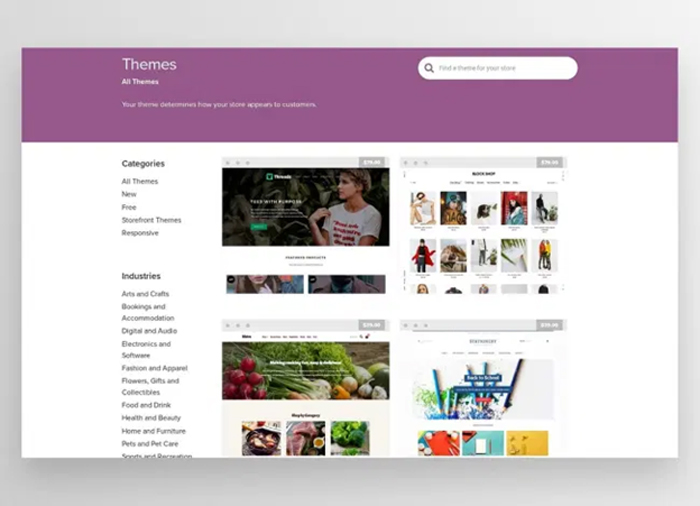
Here is how you can install your new theme:
- Select your theme from the WooCommerce library.
- In the WordPress dashboard, click Appearance → Themes.
- Navigate to the Add New button at the top of the page.
- Click Upload Theme
- Click Choose File and upload the file.
- Activate your new theme.
- Refer to the support documentation on details on setting your theme up.
Once you’re done, it’s time to migrate your store data to your new theme.
Step #3: Backup First
Before you begin migration, you should conduct a full backup just to be safe. Here’s how you can get it done.
- Navigate to the admin sidebar and click System > Tools > Backups.
- In the upper-right corner, you’ll see options for the type of backup you want: system backup, database & media backup, and database backup. The system backup will create an external copy of all of your store’s data. A database & media backup will create a copy of your database and media files. A database backup will only create a copy of your database.
- Select whether you want to place your store in maintenance mode or not.
- If you select a system backup, you can select the checkbox to include your media files.
- Confirm the backup and wait for its completion.
Step #4: Migrate
Use Cart2Cart to choose the files you want to migrate over to WooCommerce and begin the migration process. Again, you can just download all of your data as a CSV file, but the steps are complicated if you’re not an experienced developer.
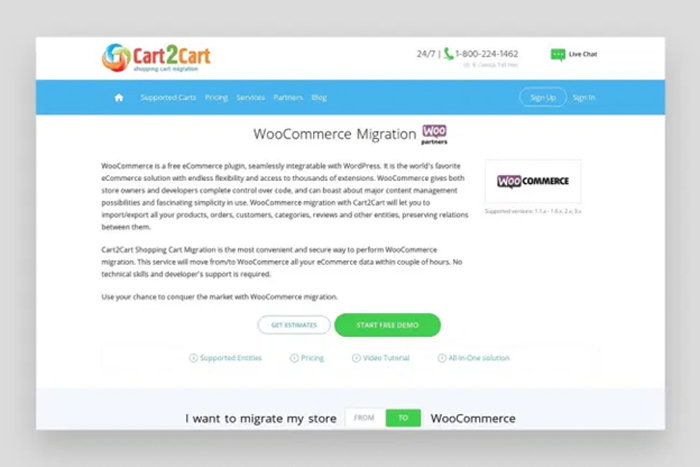
Cart2Cart is a simple-to-use tool for those who aren’t tech-savvy and want to migrate their store data from Magento to any other eCommerce business platform.
Step #5: Perform Tests
Ideally, you’ll want to make sure that the migration was a success. You can do this by performing test orders to guarantee that your APIs and features are working correctly. Ultimately, it will take a few weeks to fully have your new store ready as numerous user tests.
Need to Migrate?
Do you need help migrating from Magento to any of these eCommerce platforms or even another one? Do you want our team to build a custom CMS from scratch for your store? Contact us to learn more about our services.